
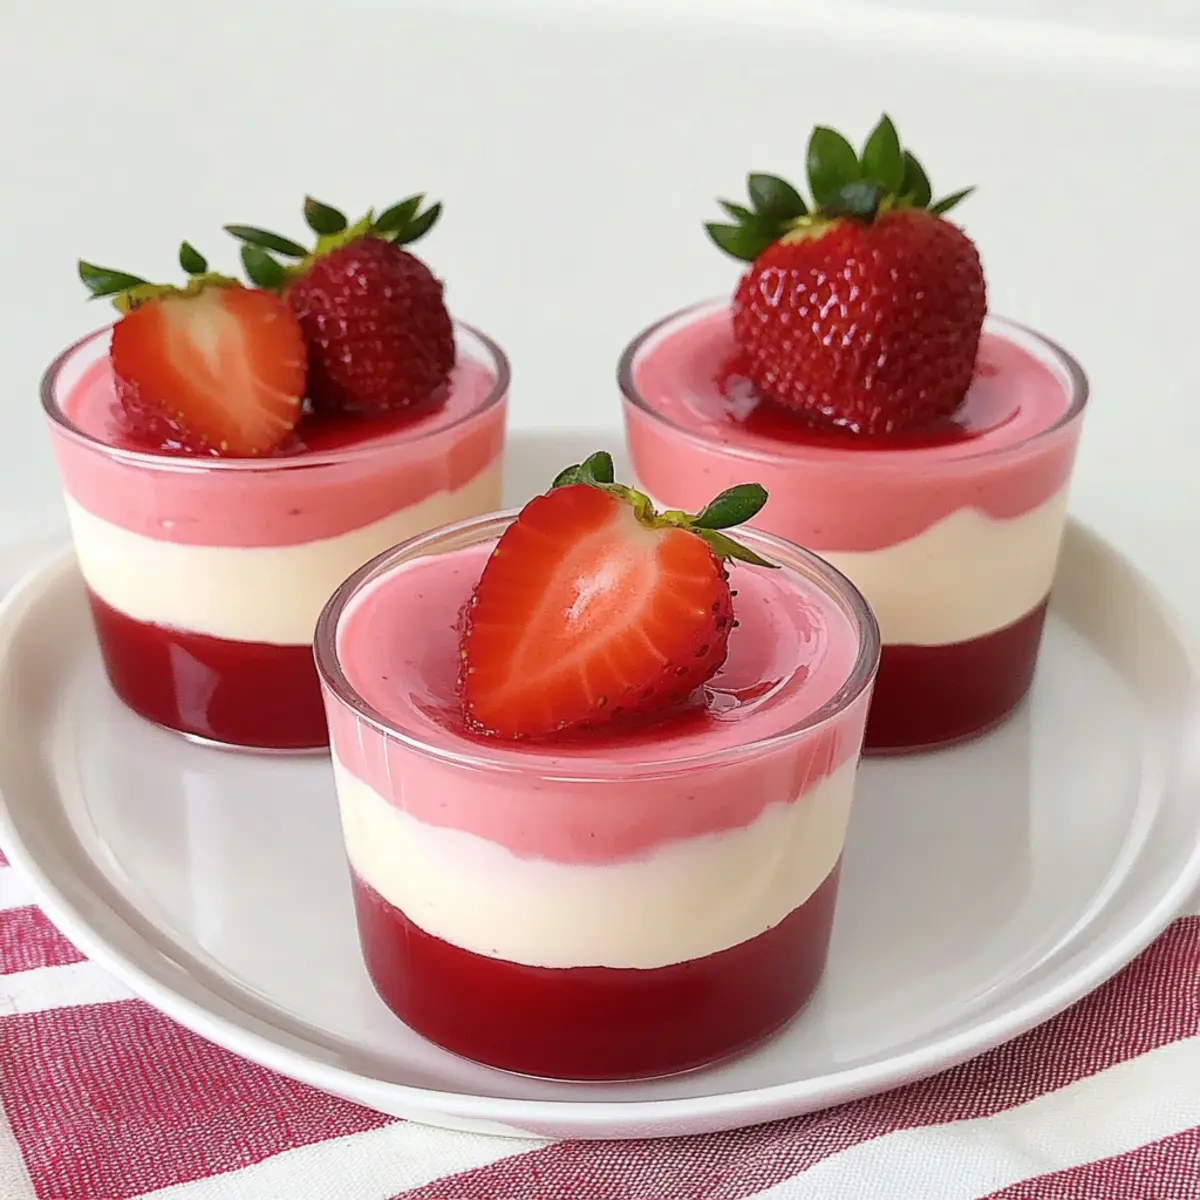
As I stared at the fresh strawberries gleaming like little rubies, a spark of inspiration hit me: it was time to whip up some delightful Strawberry Mousse Cups. This no-bake dessert isn’t just stunning to look at; it’s light, refreshing, and perfect for those warm days when you crave something sweet without the heaviness. Each spoonful layers creamy yogurt and fruity goodness, creating a dreamy balance that simply melts in your mouth. Plus, it’s super easy to prepare ahead of time—ideal for impressing guests or treating yourself to a guilt-free indulgence. Ready to add this luscious treat to your dessert repertoire? Let’s dive into making these irresistible Strawberry Mousse Cups!
Why Try These Strawberry Mousse Cups?
Irresistible Appeal: These Strawberry Mousse Cups are not just visually stunning; they offer a delightful combination of creamy and fruity flavors that will leave everyone craving more.
No-Bake Convenience: Enjoy a light dessert that requires absolutely no baking, making it perfect for those who want to whip up something delicious without the hassle.
Versatile Variations: You can easily switch up the flavors by using different fruits like mango or raspberry, catering to various tastes and dietary needs.
Make-Ahead Magic: Prepare ahead and store in the fridge for a quick and impressive treat that’s ready whenever you are—ideal for busy lifestyles!
Crowd-Pleaser: Whether hosting a gathering or having a quiet night in, these mousse cups are sure to be a hit and spark conversations. Want more enchanting ideas? Check out Strawberry Shortcake Ice or whip up a refreshing Strawberry Shortcake Protein smoothie!
Strawberry Mousse Cups Ingredients
For the Mousse
• Whipping Cream – Use cold heavy cream for a rich and fluffy texture.
• Powdered Sugar – Helps achieve soft peaks while sweetening the mousse perfectly.
• Thick Plain Yogurt – Greek yogurt adds creaminess and tang; swap with dairy-free yogurt for a non-dairy option.
• Gelatin Sheets – Essential for setting the mousse; you can substitute with 1 tablespoon of unflavored powdered gelatin if needed.
• Hot Milk – Acts as a dissolve agent for the gelatin and adds moisture.
For the Strawberry Layer
• Strawberry Sauce or Jam – Infuses the mousse with vibrant flavors and color; feel free to use other fruit purees like raspberry or mango for variety.
• Fresh Strawberries – These not only serve as a garnish but also bring a fresh, fruity pop to every bite; any other berries can work in their place!
Feel free to get creative with your Strawberry Mousse Cups, enjoying the flexibility and lightness they offer!
Step‑by‑Step Instructions for Strawberry Mousse Cups
Step 1: Prepare Gelatin
Start by softening the gelatin sheets in a bowl of ice water for 5-10 minutes, ensuring they become pliable. This step is crucial for the texture of your Strawberry Mousse Cups, so keep an eye on them until they are ready. Once softened, gently squeeze out any excess water and set them aside while you prepare the other components.
Step 2: Whip Cream
In a chilled mixing bowl, combine the cold whipping cream and powdered sugar. Using an electric mixer, whip the mixture on medium speed until soft peaks begin to form, about 3-4 minutes. The cream should be fluffy and hold its shape, which will provide a rich texture to your mousse. Once achieved, set the whipped cream aside, allowing it to maintain its lightness.
Step 3: Make Base Mousse
In a separate bowl, blend the thick plain yogurt into the whipped cream until perfectly smooth, creating a creamy base for your Strawberry Mousse Cups. Next, dissolve the softened gelatin in hot milk, stirring until it completely incorporates. Let the mixture cool slightly before gently folding it into the yogurt-cream blend, ensuring you maintain the airy texture.
Step 4: Create Strawberry Layer
Take a portion of the base mousse and mix it with the strawberry sauce or jam of your choice until well combined. This vibrant pink mixture will become the beautiful layer in your Strawberry Mousse Cups. Aim for a consistent blend, as the color and flavor will enhance the overall experience of the dessert.
Step 5: Assemble First Layer
Evenly distribute the strawberry mousse into the serving cups, filling them about halfway. It’s essential to smooth the tops for an appealing presentation. Place the cups in the refrigerator and chill for at least 1 hour. This chilling period allows the strawberry layer to set properly, creating a delightful base for the next layer.
Step 6: Add Second Layer
Once the strawberry layer is set, gently pour the remaining plain mousse over the top of each strawberry layer. Fill the cups to the brim for a beautiful layered effect. Return the cups to the refrigerator, allowing them to chill for another hour, ensuring they become firm and creamy.
Step 7: Decorate
After the second layer has set, it’s time to add the finishing touch. Drizzle additional strawberry sauce on top of each mousse cup for added flavor and a burst of color. Chill the cups for an additional 30 minutes to allow the layers to meld together perfectly, creating a stunning visual appeal.
Step 8: Serve
Just before serving your delightful Strawberry Mousse Cups, garnish each with fresh strawberries for a touch of elegance and flavor. This final touch not only looks beautiful but adds a refreshing bite to your dessert, enhancing the overall enjoyment of this no-bake treat. Enjoy every creamy spoonful!
What to Serve with Layered Strawberry Yogurt Mousse
Indulging in creamy, fruity bliss is just the beginning—let’s elevate your dessert experience with delightful pairings!
-
Crispy Biscotti: Crunchy and slightly sweet, biscotti adds an enjoyable contrast to the smooth mousse, making each bite even more satisfying.
-
Fresh Mint Leaves: Garnishing with mint not only adds a pop of color but also brings a refreshing herbal note that complements the fruity flavors beautifully.
-
Light Sparkling Wine: A glass of bubbly white or rosé adds a celebratory touch, enhancing the lightness and sweetness of your mousse.
-
Chocolate-Covered Strawberries: For an elevated treat, pairing the mousse with these decadent bites creates a delightful mix of textures and flavors that will excite the palate.
-
Shortbread Cookies: Small and buttery, these cookies provide a rich balance to the lightness of the mousse, inviting a lovely contrast with every spoonful.
-
Coconut Sorbet: Its tropical flair and frozen texture refresh the palate, creating a whimsical harmony with the strawberry layers of the mousse.
-
Berry Compote: A drizzle of warm berry compote adds a luscious, tangy dimension, enriching the mousse experience and boosting fruity goodness.
-
Limoncello Spritzer: This citrusy drink provides a zesty twist, perfectly contrasting the sweetness of the mousse while keeping the overall dessert experience refreshing.
With these delightful pairings, your Layered Strawberry Yogurt Mousse will surely shine as the centerpiece of a blissful dessert spread!
Expert Tips for Strawberry Mousse Cups
-
Gelatin Vigilance: Make sure the gelatin is fully dissolved before mixing with the mousse base to prevent any unpleasant texture issues.
-
Chill Time Check: Adjust the chilling times based on your cup sizes; smaller cups may require less time to set than larger ones.
-
Fold Gently: When folding the gelatin mixture into the whipped cream, do it gently to maintain the airiness of your mousse—this step is vital for delicious Strawberry Mousse Cups.
-
Fresh Garnish Only: Add fresh strawberry garnishes just before serving to keep them from wilting and ensure a beautiful presentation.
-
Storage Savvy: If making ahead, store the mousse cups covered in the fridge for up to 3 days. Assemble the final toppings just before serving for the best appearance.
Strawberry Mousse Cups Variations
Feel free to make these delightful treats your own with a little customization and creativity!
-
Fruit Swap: Substitute strawberries with purees like raspberry, mango, or peach for exciting flavor twists. Every bite will surprise the palate with something new!
-
Dairy-Free Delight: Use coconut cream instead of whipping cream for a completely dairy-free version. This swap creates a slightly tropical flavor, adding a rich, creamy texture without the dairy.
-
Nutty Crunch: Add a layer of crushed nuts such as almonds or hazelnuts between the mousse layers for extra crunch. This not only enhances the texture but also introduces a delightful nutty flavor.
-
Chocolate Indulgence: Swirl in some melted dark chocolate into the mousse base for a chocolate-strawberry fusion that’s irresistible. The rich chocolate complements the sweetness of the strawberries beautifully.
-
Extra Sweetness: Incorporate vanilla extract or almond extract into the mousse for an added depth of flavor. These aromatic notes will elevate the overall experience, making each spoonful even more delightful.
-
Spicy Kick: Add a pinch of cayenne pepper or some finely grated ginger for a surprising heat that contrasts wonderfully with the sweet and creamy layers. This unique twist is sure to impress adventurous eaters.
-
Layered Sundae Experience: Pour a layer of chocolate or caramel sauce between the mousse layers for a sundae-inspired treat. It brings an indulgent twist that pairs beautifully with the fluffy mousse.
-
Yogurt Variations: Experiment with flavored yogurts, such as vanilla or lemon, instead of plain yogurt. This simple change can add a fun twist depending on your chosen fruit and complement the mousse’s overall flavor profile.
Dive into these variations and discover just how versatile your Strawberry Mousse Cups can be. The possibilities are endless—do you want to pair them with a light snack? Try serving them alongside my Strawberry Shortcake Protein smoothie for a fresh, post-dinner treat! Or, for a full dessert experience, complement them with my delicious Strawberry Shortcake Ice cream cake!
Storage Tips for Strawberry Mousse Cups
-
Fridge: Store your Strawberry Mousse Cups covered in the refrigerator for up to 3 days. This will keep them fresh and maintain the beautiful layers you’ve created.
-
Freezer: While it’s best to enjoy these mousse cups fresh, you can freeze them for up to a month. Just remember to use an airtight container to prevent freezer burn.
-
Serving After Storage: If you’ve stored them in the fridge, simply remove them and serve. If frozen, allow them to thaw in the fridge overnight before serving to restore their creamy texture.
-
Garnish Freshness: Always add fresh berries or any toppings right before serving to ensure they look appealing and are at their freshest.
Make Ahead Options
These delightful Strawberry Mousse Cups are perfect for meal prep, saving you time when entertaining or enjoying a sweet treat during busy weeks! You can prepare the mousse layers up to 3 days ahead of time. Simply whip the cream, mix in the yogurt and gelatin as directed, and assemble up to the second layer, then refrigerate. For best quality, store the cups covered in the refrigerator to prevent any moisture loss. When you’re ready to serve, just add the strawberry sauce and garnish with fresh strawberries for a stunning presentation. With these make-ahead tips, you’ll have a restaurant-quality dessert ready with minimal effort!
Strawberry Mousse Cups Recipe FAQs
What type of strawberries are best for the recipe?
Absolutely! Look for fresh strawberries that are vibrant red and firm, without any dark spots or mold. The ideal strawberries should be fragrant and slightly glossy, indicating ripeness. If you’re on the hunt for the sweetest flavor, try to choose those that are in season, as they tend to be at their prime.
How should I store leftover mousse cups?
Very! Store your Strawberry Mousse Cups covered in the refrigerator for up to 3 days. Ensure they are airtight to keep the flavors intact and prevent any odors from the fridge affecting them. If you’ve made them in advance, this will maintain the beautiful layers and delightful texture you’ve crafted.
Can I freeze the mousse cups? If so, how?
Absolutely! Although it’s best to enjoy these mousse cups fresh, you can freeze them for up to a month. Use an airtight container to prevent freezer burn; alternately, you can wrap individual cups tightly in plastic wrap before placing them in a freezer-safe bag. To serve, simply thaw them in the refrigerator overnight and add fresh garnishes before indulging.
Why did my mousse not set properly?
Oh no! A common issue with mousse not setting can be due to the gelatin not being fully dissolved or incorporated. Make sure to soften your gelatin sheets adequately and allow the hot milk to fully dissolve them before mixing with the yogurt and cream. Cooling the mixture slightly before combining it with whipped cream is also vital, as this prevents deflation.
Is this recipe suitable for dairy allergies?
Yes! You can easily adapt this recipe for a dairy-free option by using coconut cream instead of heavy whipping cream and a dairy-free yogurt alternative. This substitution will alter the flavor slightly but will still yield a delightful dessert. Just double-check your ingredients to ensure they’re fully dairy-free.
What can I use instead of gelatin if I want a vegetarian option?
Very! If you’re looking for a vegetarian alternative, try using agar-agar, a seaweed-based setting agent. Substitute 1 tablespoon of gelatin with about 1 tablespoon of agar-agar powder, following the package instructions to ensure it sets correctly. Remember, agar-agar typically needs to be boiled to activate its gelling properties, so gently heat it with the milk to dissolve.
Delightful Strawberry Mousse Cups for a Refreshing Treat
Ingredients
Equipment
Method
- Soften the gelatin in ice water for 5-10 minutes, then squeeze out excess water.
- Whip the cold whipping cream and powdered sugar until soft peaks form, about 3-4 minutes.
- Blend the yogurt into the whipped cream until smooth, then dissolve the gelatin in hot milk.
- Mix a portion of the mousse with strawberry sauce until combined.
- Distribute the strawberry mousse into serving cups and chill for 1 hour.
- Pour the remaining plain mousse over the strawberry layer and chill for another hour.
- Drizzle additional strawberry sauce on top and chill for 30 minutes.
- Garnish with fresh strawberries just before serving.
Leave a Reply